Multiple Call Flows allow you to assign a unique call journey to each phone number, ideal when your business offers various services, departments, campaigns, or operates with different opening hours. Instead of forcing everything through one generic path, each number gets its own tailored experience.
Why Use Multiple Call Flows?
If your business only does one thing, a single call flow is enough, but if Sales, Support, Campaign A, and After-Hours all have different needs? Multiple Call Flows keep things organised, professional, and efficient. Each call flow is fully independent, meaning you can customise messages, business hours, routing logic, queues, and more, all running simultaneously.
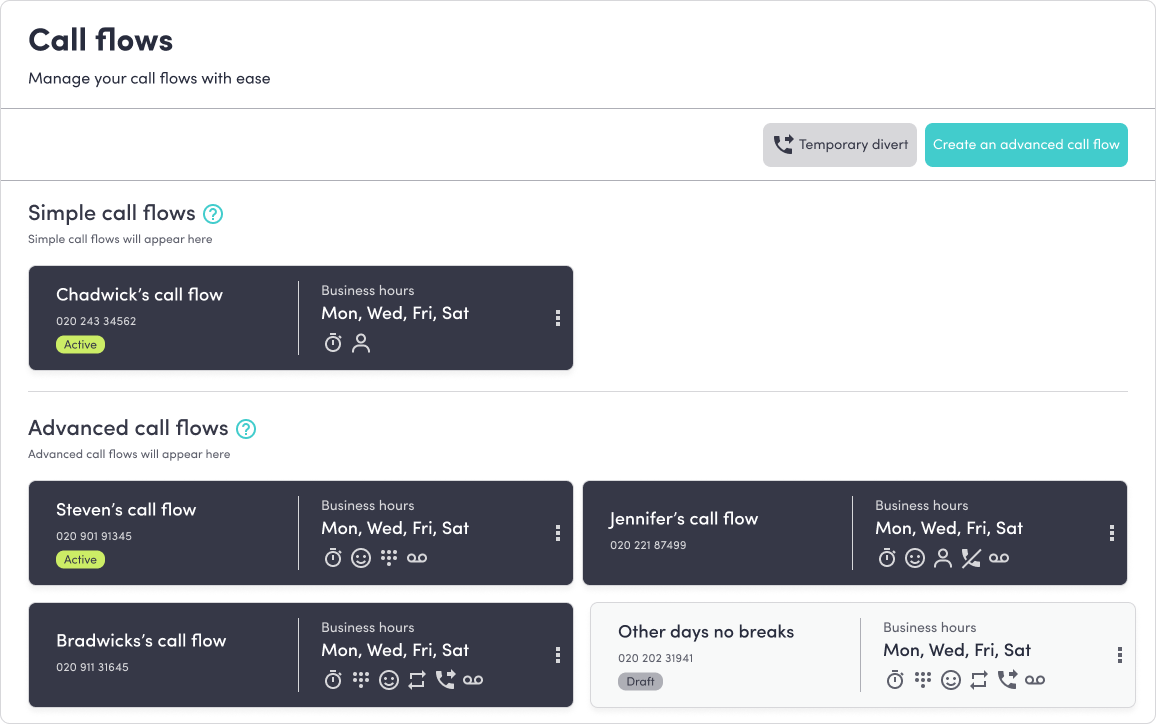
Go to Your Call Flows Dashboard
From your mybOnline dashboard:
Select Call Flows from the left-hand menu.
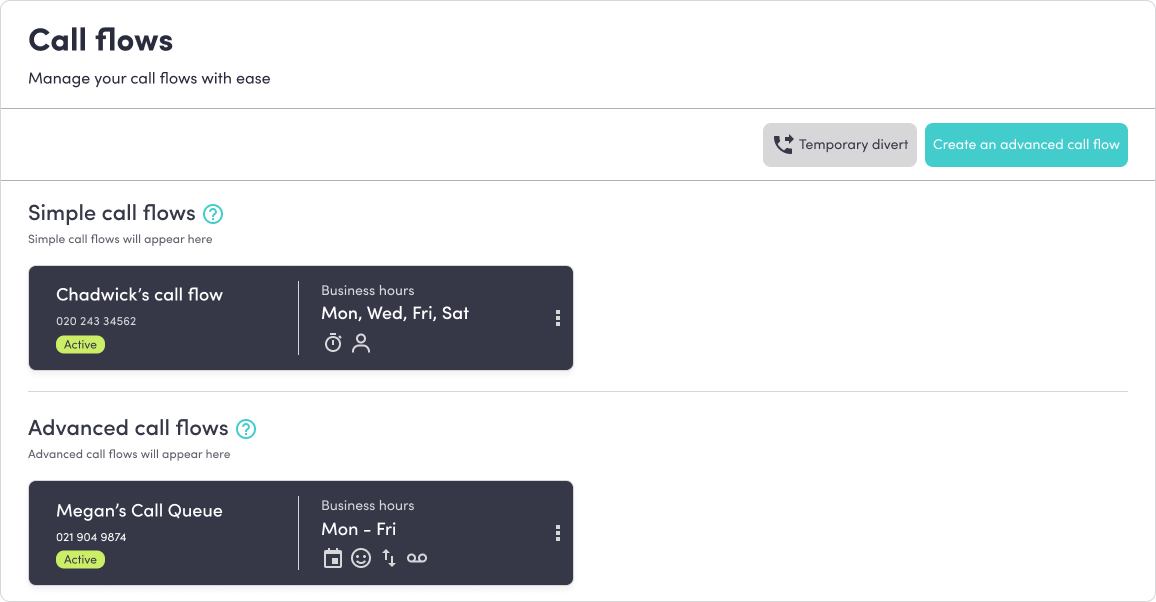
Here you'll see:
Your simple and advanced call flows
Their assigned phone numbers
Icons representing their key actions (e.g., business hours, greeting, transfer, voicemail)
Whether they’re active or still a draft
This page is designed to give you a quick, at-a-glance overview of what’s live and where each number is mapped.
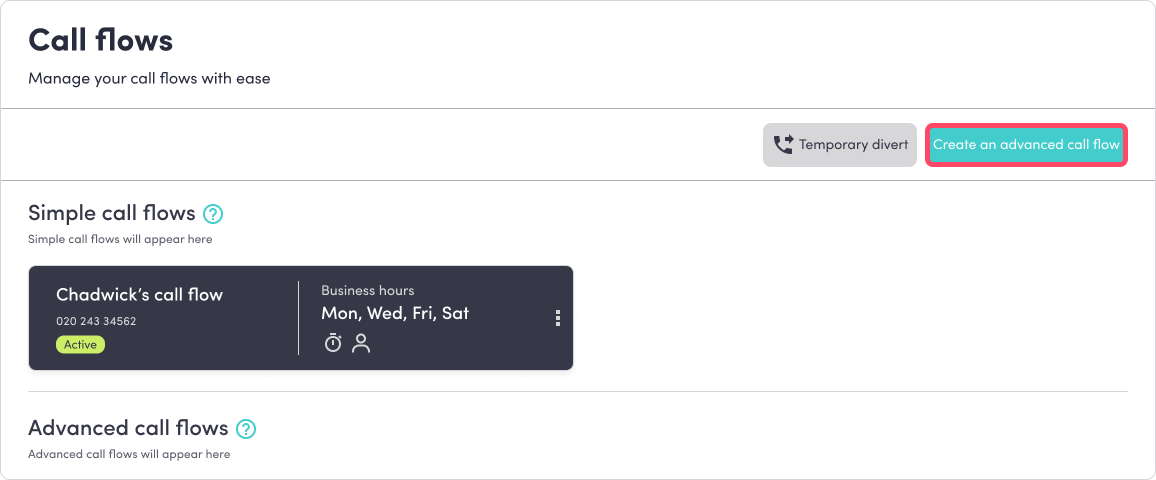
Create a New Advanced Call Flow
To create a new, fully customisable flow:
Click Create an advanced call flow.
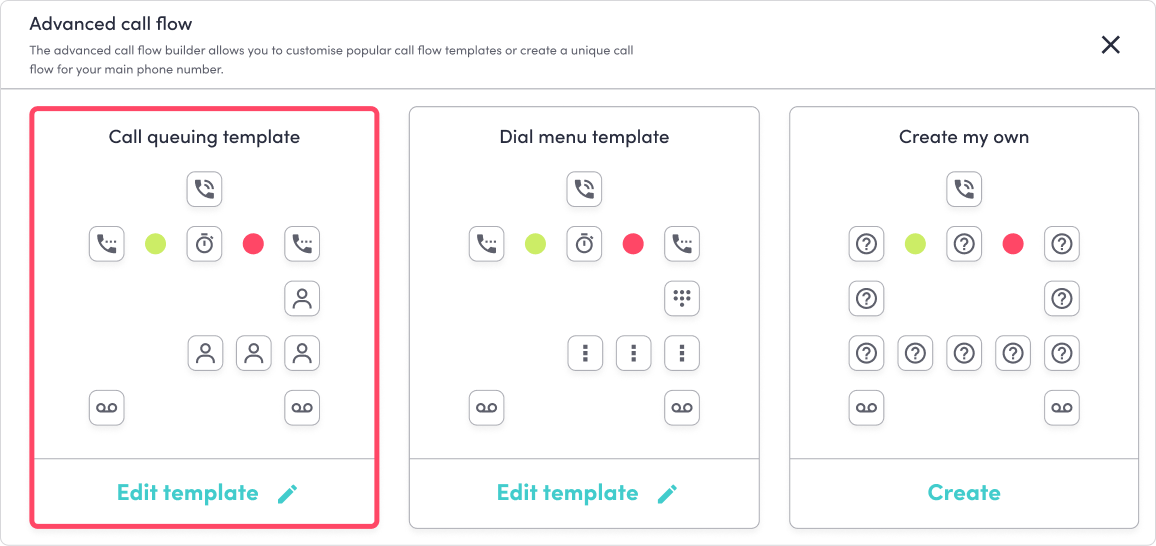
Choose a template to start building your call journey to suit the specific team, service, or campaign that number will support. Each flow is its own isolated, purpose-built journey.
Assign a Phone Number to the Flow
Every call flow needs its own number.
In the flow you’re working on, select Assign Number.
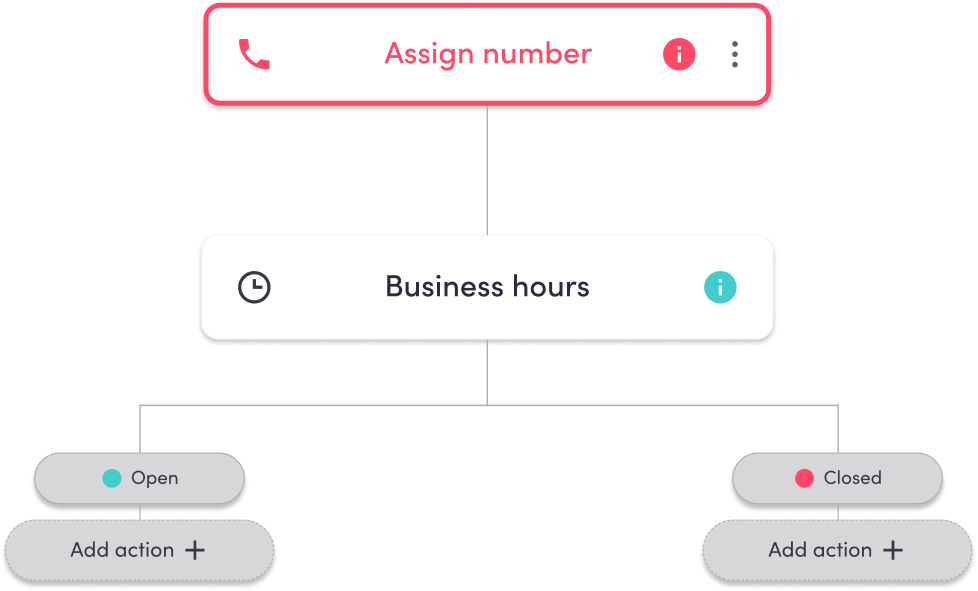
Choose from your list of unassigned phone numbers.

Important: You cannot assign a number that is already linked to another active call flow.
If a number is in use, it must be unassigned first. Once assigned, you’ll see the number appear clearly at the top of the flow.
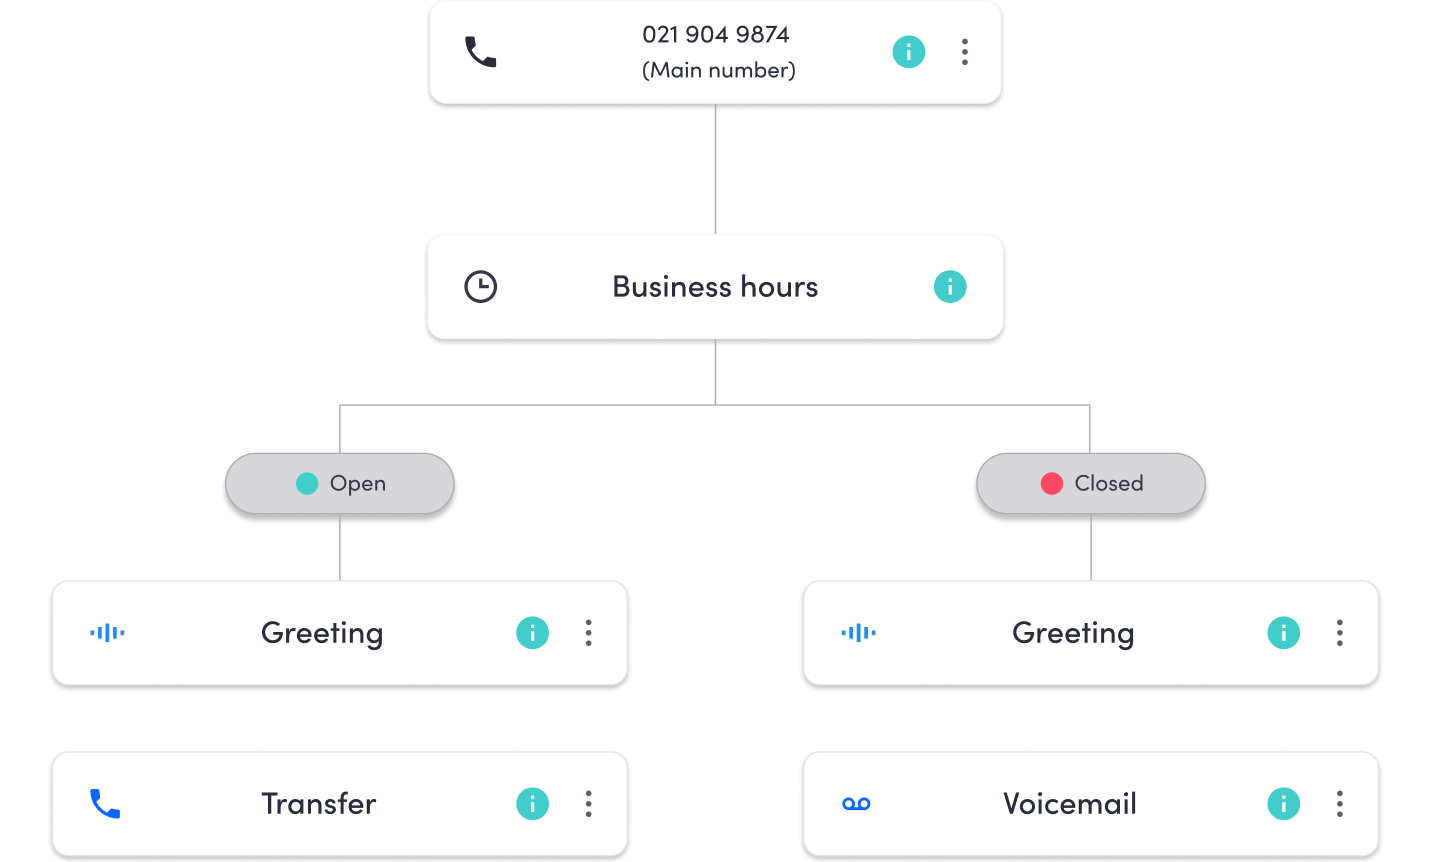
Build Out Your Call Journey
Inside the call flow editor, map each part of your caller’s path. Typical elements include:
Business Hours (open vs. closed behaviour)
Greetings
Transfers to teams/queues
Voicemail
Menu options
Ring groups
Before saving, make sure every branch leads somewhere, no dead ends, no missing steps, no “mystery boxes” that leave callers hanging.
Save & Enable Your Call Flow
Once everything is mapped correctly:
Click Save & Enable.

The system will apply your call flow to the assigned number.
You’ll return to the Call Flows page to see it listed as Active.
From here, you can easily manage, edit, duplicate, or disable flows as your business evolves.
Was this article helpful?
That’s Great!
Thank you for your feedback
Sorry! We couldn't be helpful
Thank you for your feedback
Feedback sent
We appreciate your effort and will try to fix the article