The AI Receptionist answers your calls 24/7. It greets callers, answers common questions, takes messages, and puts people through to your team when needed. No missed calls, even out of hours. You can set it up yourself in under 5 minutes. Four quick steps: Create, Train, Guide, Connect.
Before You Start
Have these ready:
Your website URL (Optional). It reads your site to learn about your business.
Your top caller questions. An understanding of what your callers ask about most often.
Important: Your AI Receptionist uses its own number. It won't take over your main line.
Step 1: Create
Go to Users & Devices.
Click Create AI Receptionist.
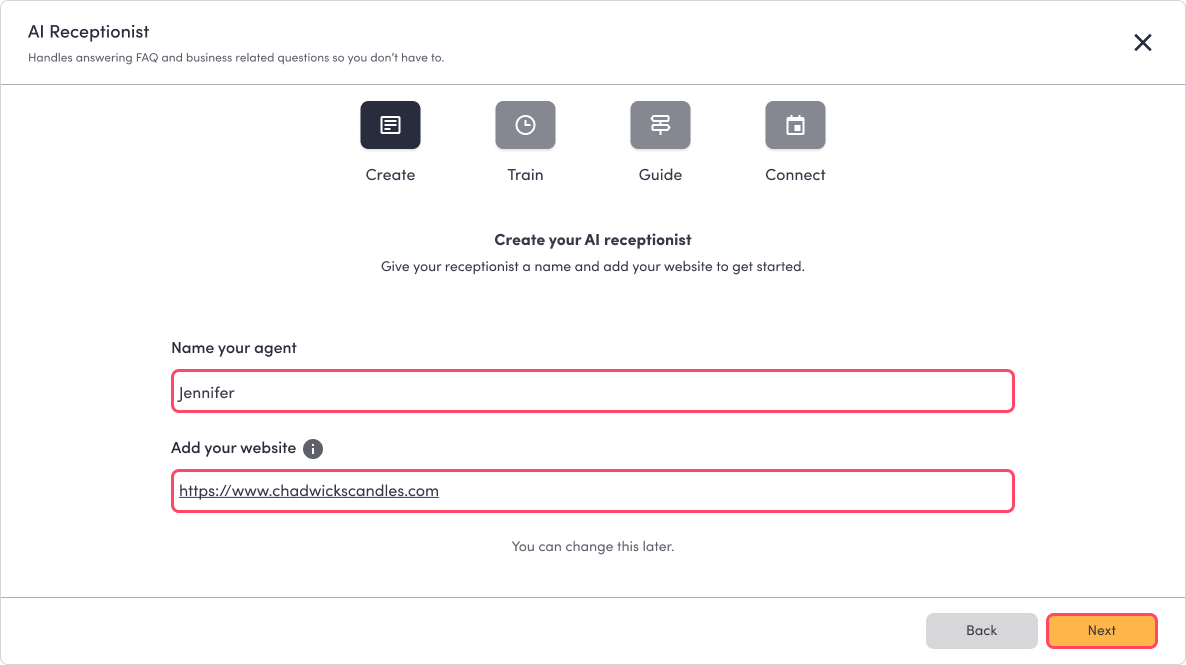
Give it a name (e.g. "Emma"). This is how it greets callers.
Enter your website URL(Optional). It reads your site to learn about your business.
Step 2: Train
Your industry FAQs are pre-filled. Simply:
Edit the answers to fit your business.
Remove anything that doesn't apply.
Add your own questions.
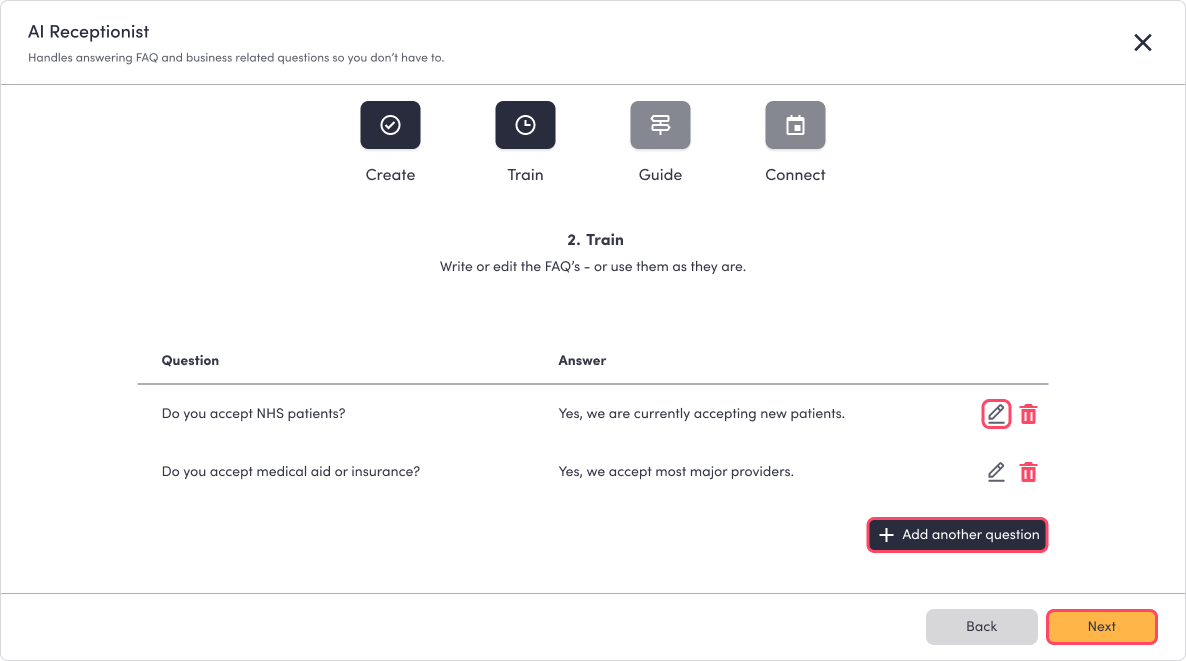
Tip: Write questions the way callers ask them, and answers the way you’d like them expressed. Keep answers short.
Step 3: Guide
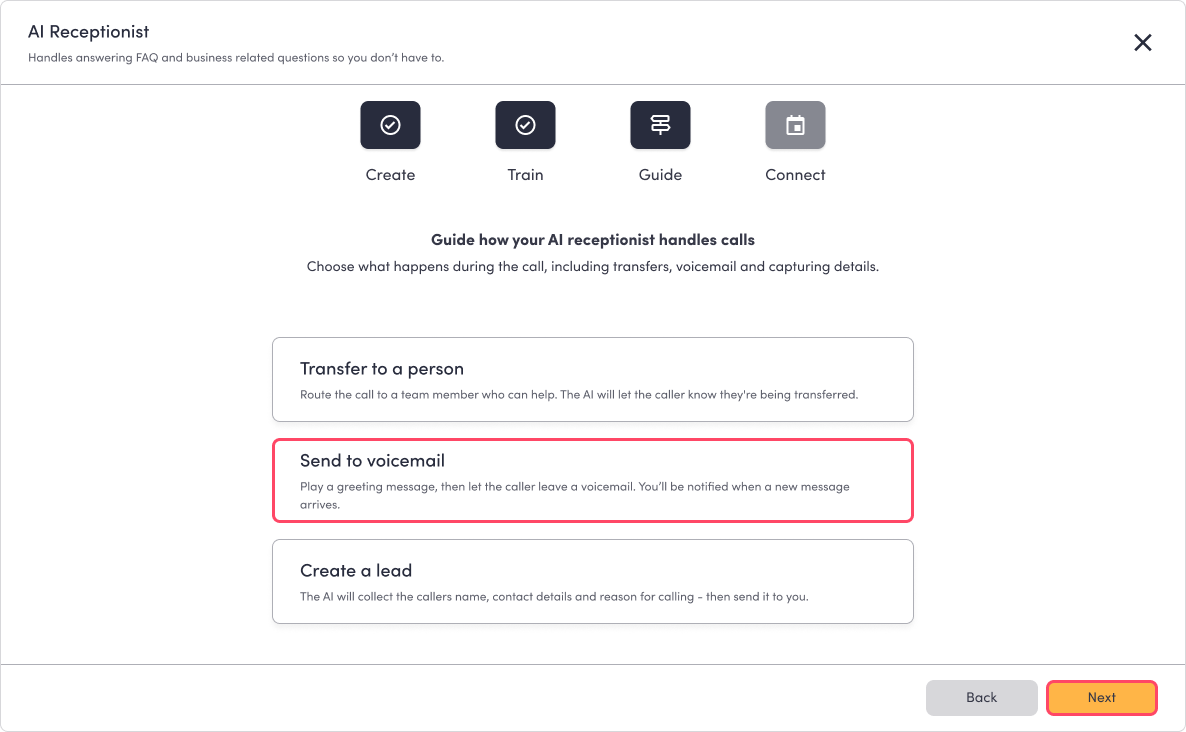
Choose what it does when a caller needs a person:
Transfer the call to a number you choose.
Leave a voicemail message.
Take their details for your team to give them a callback.
Important: Check that the transfer number is correct and monitored.
Step 4: Connect
Connect your AI Receptionist to your Google Calendar to allow it to make Appointment Bookings on your behalf.
Click Next to finish.
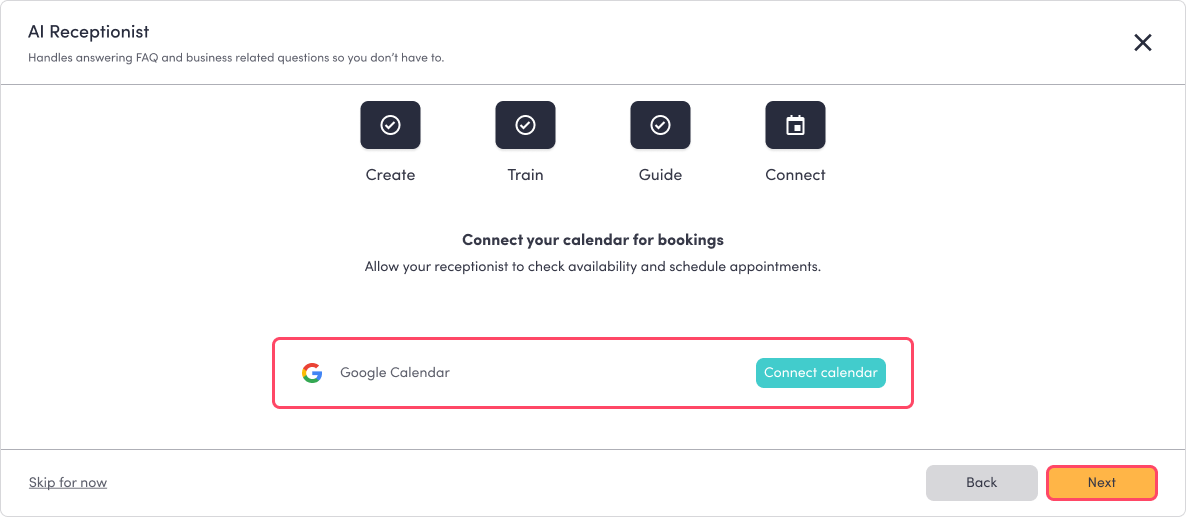
Note: This step is optional.
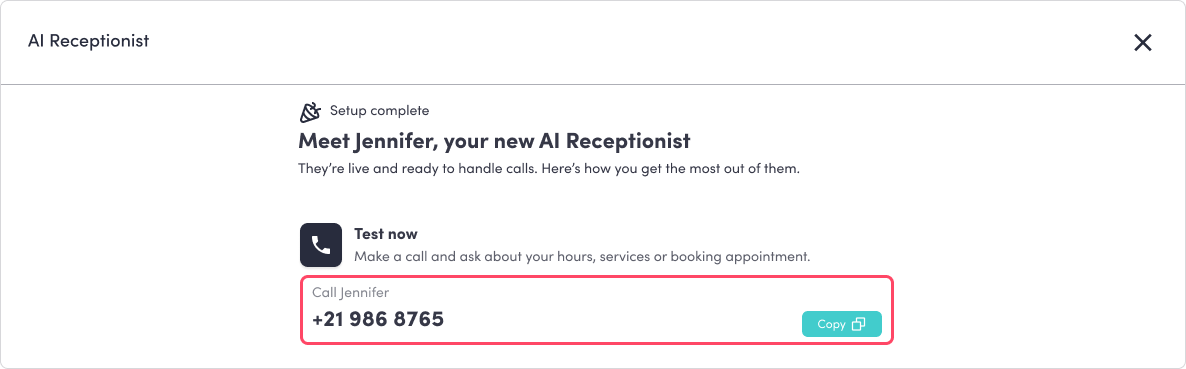
Make sure to Test It
Call your AI Receptionist's number from your phone.
Ask a few real questions ("What are your opening hours?", "Can I speak to someone?").
If anything sounds off, use the quick links to fix it in your FAQs.
Manage It Anytime
Head back to its settings whenever you need to:
Edit FAQs to fix or improve answers.
Refresh your website after big changes (new prices, services).
Update your details if your hours or address change.
Rename it or change its transfer number.
Was this article helpful?
That’s Great!
Thank you for your feedback
Sorry! We couldn't be helpful
Thank you for your feedback
Feedback sent
We appreciate your effort and will try to fix the article